Understanding Natural Light The Foundation Of Great Dog Photography

How To Identify The Best Natural Light Sources In Your Home
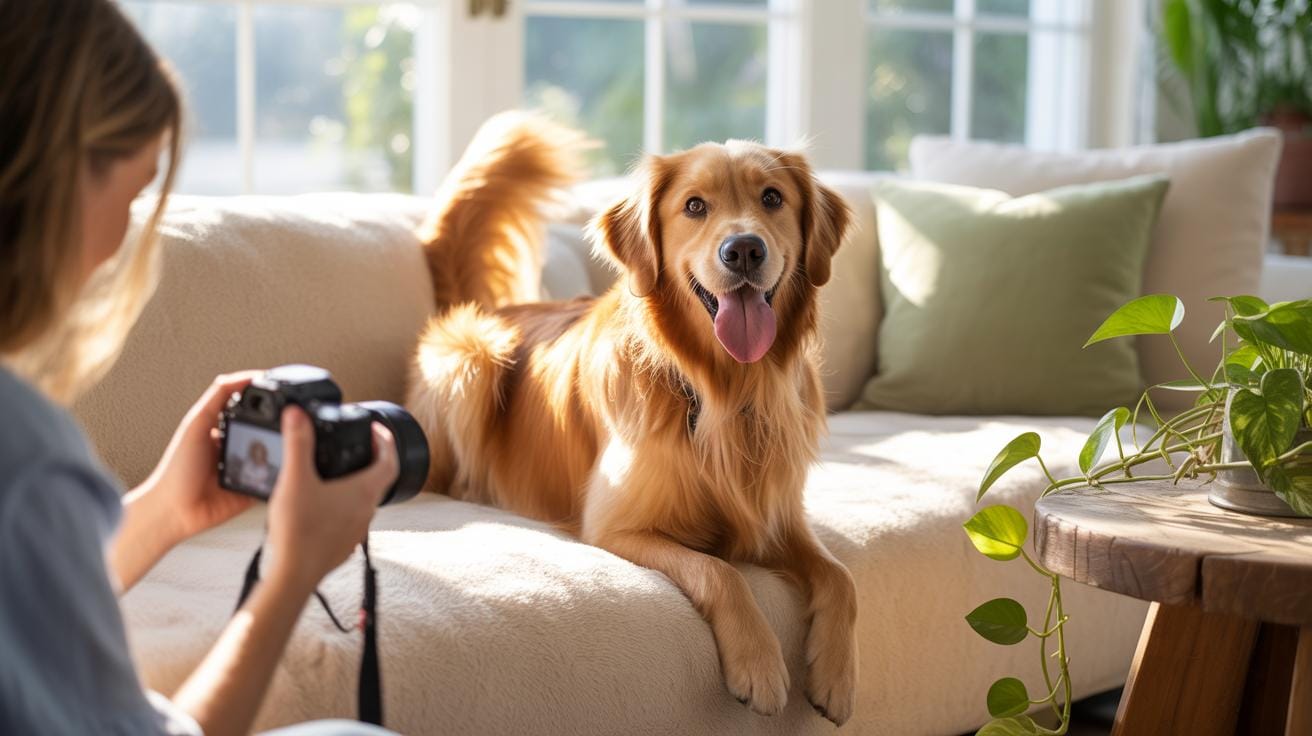
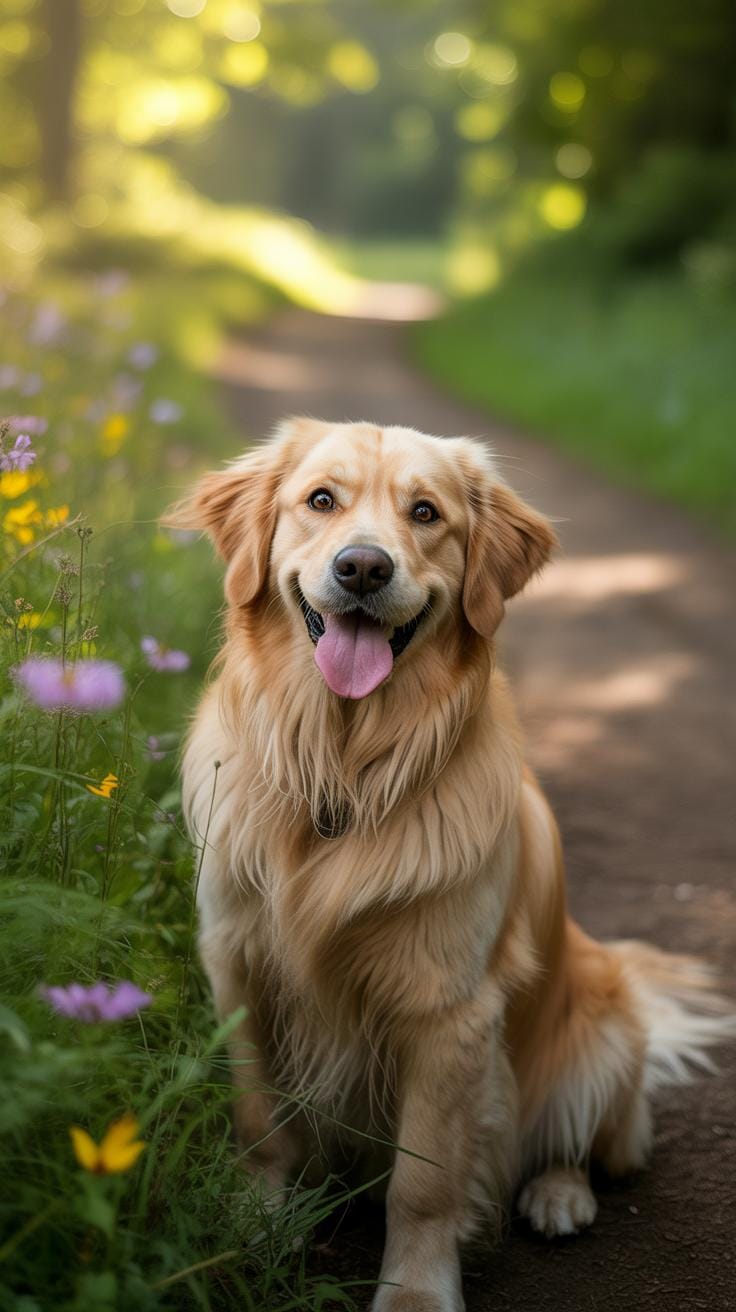
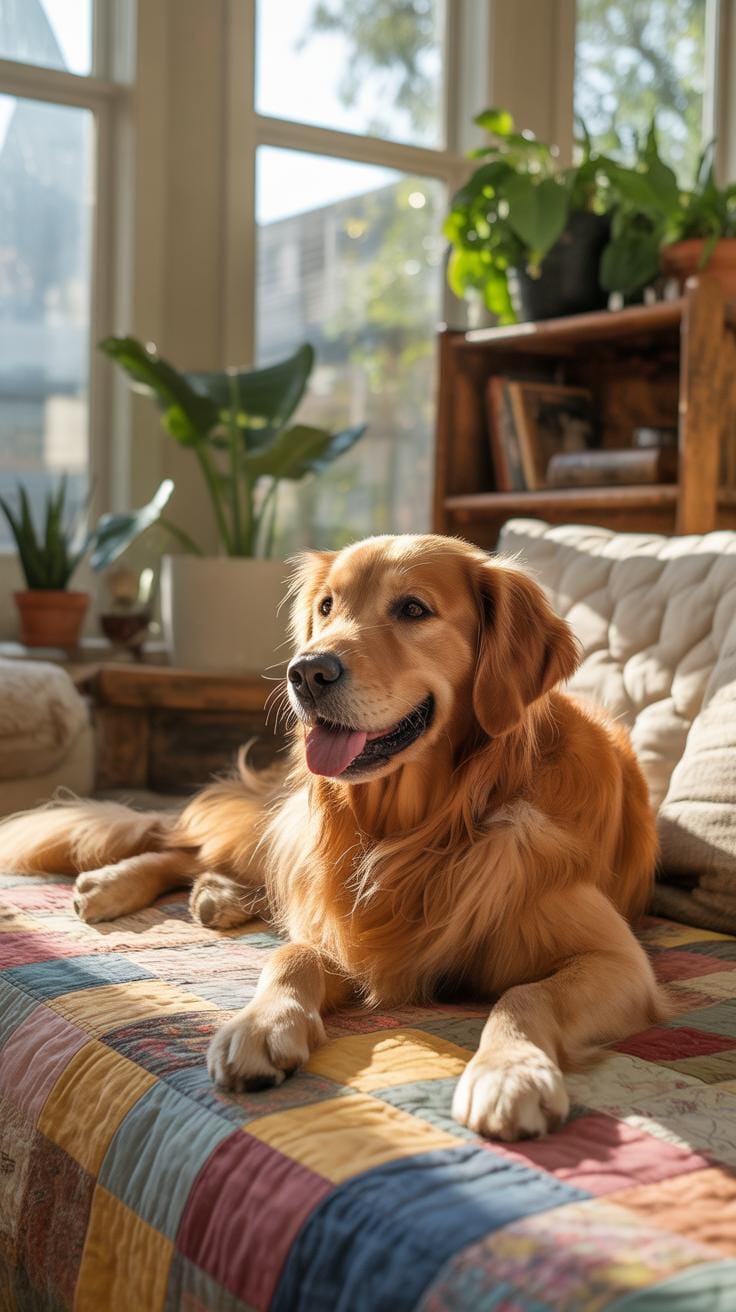
North-facing windows provide the most consistent light throughout the day. This light stays soft and avoids the harsh shadows that ruin dog portraits. Place your dog at a forty-five-degree angle to the glass. This positioning creates depth on their face and body. Avoid small, high windows that create “raccoon eyes” under the brow. Large sliding glass doors offer the best surface area for even coverage.
Check your floor surfaces for light bounce. White or light-colored floors act as natural reflectors. They push light back up into the dog’s chest and under the chin. Dark wood or carpet absorbs light and kills detail in the fur. Move your dog to a kitchen with light tiles or use a white sheet on the floor. This technique fills in shadows without using a distracting electronic flash unit.
Why Golden Hour Light Through Windows Flatters Your Dogs Coat And Features
Golden hour occurs shortly after sunrise and before sunset. During these times, the sun sits lower in the sky. The light travels through more of the atmosphere, which scatters blue light and leaves warm tones. This warmth enhances the reds, browns, and golds in a dog’s coat. It makes the fur look vibrant and healthy. Low-angle light also creates catchlights in the eyes, adding a sense of life.
Direct midday sun causes high contrast and squinting. It washes out the texture of the fur and creates blown-out highlights. Window light during the golden hour acts like a giant softbox. It fills in the area around the snout and ears. This soft directional light defines the physical structure of the dog’s face. Use this time to capture the fine details of their whiskers and the texture of their nose.

Choosing The Right Camera Settings For Indoor Dog Photo Tips
Understanding Shutter Speed, ISO, And Aperture For Photographing Active Dogs Indoors
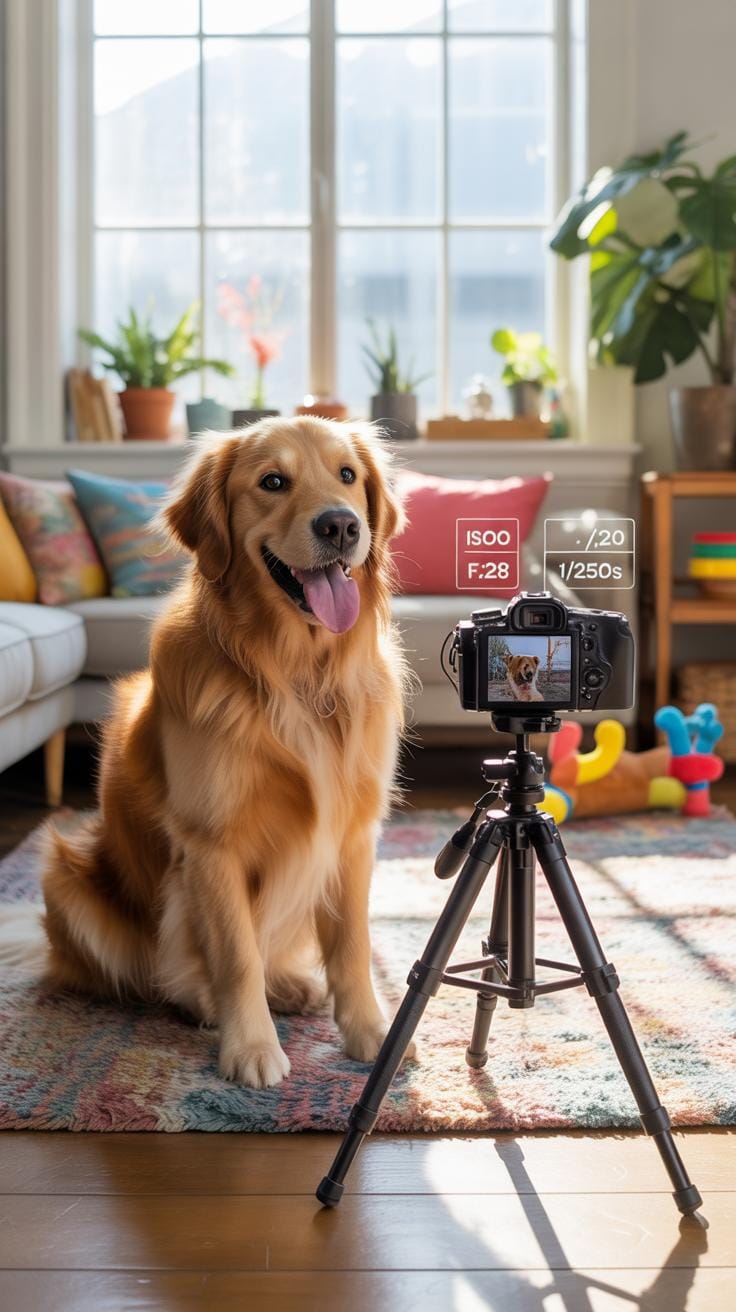
Shutter speed stays your most critical setting when photographing your dog at home. Dogs move fast and indoor light is often weak. You must set a shutter speed of at least 1/250 to freeze motion. Slower speeds result in blurry limbs or faces. Use a wide aperture like f/2.8 or f/1.8 to let in maximum light. This creates a shallow depth of field.
High ISO settings compensate for the lack of natural interior light. You will likely need an ISO between 800 and 3200 depending on your windows. Modern digital sensors handle high noise better than older film stock. Grain is a fair trade for a sharp image. Use continuous focus mode to track the dog as it moves. This ensures the eyes stay sharp throughout the action.
How To Use Your Smartphone Camera Effectively For Indoor Dog Portrait Tips
Smartphone cameras rely on software to mimic professional depth. Use portrait mode to blur the background and highlight your dog. This works best when the dog stands three feet away from the wall. Ensure the main light source hits the dog from the side or front. Backlighting usually causes the phone sensor to underexpose the subject. This results in a dark and muddy image.
Lock your focus by tapping and holding the screen on the dog’s eyes. Most phones allow you to adjust exposure manually after locking focus. Slide your finger down to lower brightness if the fur looks blown out. Avoid using the digital zoom because it destroys image resolution. Move your body closer to the dog instead. Physical proximity maintains the data integrity of the photo.

Setting Up The Perfect Background For Pet Photography Ideas At Home
How To Use Household Items Like Blankets And Furniture As Natural Backdrops
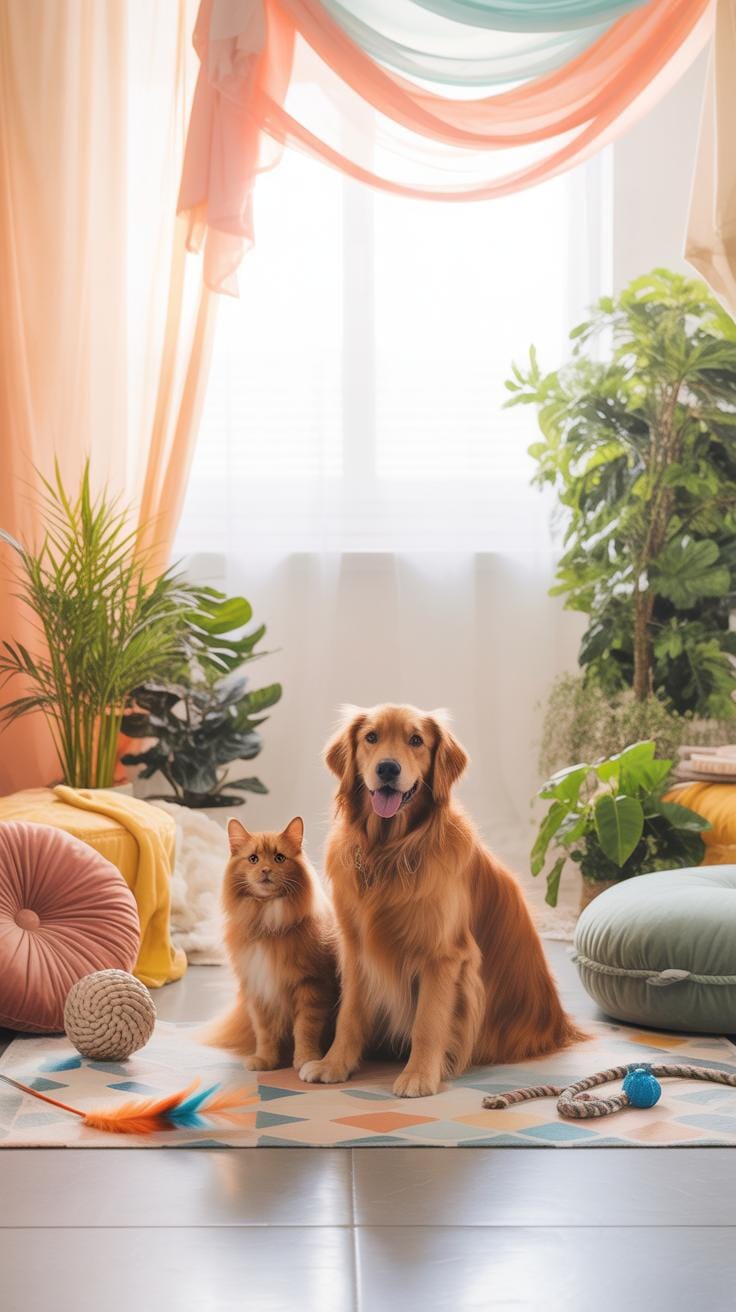
Utilize solid-colored textiles to eliminate visual noise. Drape a heavy wool or cotton blanket over a chair to create a seamless cove. This technique mimics professional studio sweeps used in mid-century portraiture. Choose neutral tones like charcoal or beige to ensure the dog remains the high-contrast subject. Avoid busy patterns that compete with the texture of the animal’s fur during the shot.
Position your dog on elevated furniture to control the camera angle. A wooden bench or leather ottoman provides a stable surface with a clear textural identity. These materials anchor the image and provide a sense of scale. Ensure the furniture color complements the dog’s coat. Dark leather works well for light-colored dogs. Use the physical edges of the furniture to frame the composition and lead the eye.
Decluttering And Styling Your Space To Keep The Focus On Your Dog
Clear the shooting area of all non-essential items. Professional interior photographers call this staging. Remove power cords, remote controls, and trash bins from the frame. These objects distract the viewer and create a messy aesthetic. A clean environment allows the camera sensor to calculate exposure and focus more accurately on the subject. Minimalist spaces prioritize the dog as the primary point of interest.

Assess the background for vertical and horizontal lines. Align the camera with the horizon or a wall edge to prevent slanted perspectives. Use negative space to give the subject room to breathe within the frame. Move the dog away from the wall to create depth. This physical separation produces a soft blur in the background. High-quality images require this distinction between the sharp subject and the receding environment.
Mastering Composition Techniques For Standout Dog Photography Ideas
Applying The Rule Of Thirds To Frame Your Dog More Compellingly
The rule of thirds is a foundational principle in visual arts. You divide your frame into a grid with two horizontal and two vertical lines. This creates nine equal rectangles. Placing your dog at the intersection points creates a natural balance. This technique directs the viewer’s eye across the image. It prevents the static feel of a centered subject. Use your phone camera grid settings to align the dog.
Position the dog on the left or right vertical line instead of the middle. Leave open space in the direction the dog is looking. This lead room implies movement and purpose. Professional photographers use this method to create a narrative within a single frame. It makes the composition feel deliberate and sophisticated. Mastering this grid system improves your shots immediately. It transforms basic snapshots into structured photographs with clear intent.
Shooting From Your Dogs Eye Level For More Intimate And Engaging Portraits
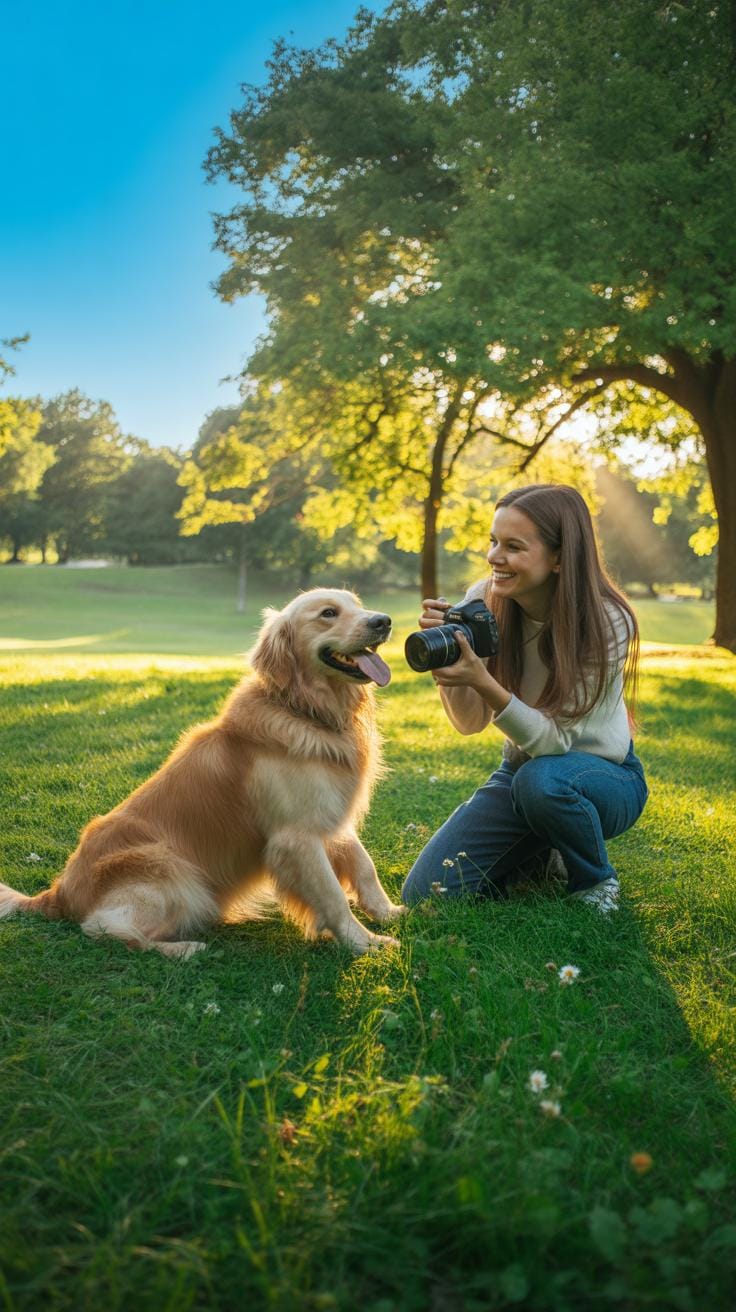
Most people photograph dogs from a standing position. This downward angle creates a physical and emotional distance. It makes the dog look small and disconnected from their environment. Getting down on the ground changes the perspective entirely. You enter the world of the animal when you align your lens with their eyes. This shift creates an immediate connection. It highlights the dog’s facial expressions and features.
Physically lower your body to the floor or use a low tripod. Eye-level shots create a shallow depth of field. This effect blurs the background and makes the subject pop. It mimics the style of professional portraiture. Your dog becomes the hero of the image rather than just a pet on a rug. This technical change provides a sense of scale. It makes the viewer feel like a participant in the dog’s life.
Using Treats And Toys Practical Pet Photography Tips At Home For Capturing Attention
How To Use Treats Strategically To Direct Your Dog’S Gaze Toward The Camera
Position the treat directly above the camera lens to create immediate eye contact. This technique aligns the dog’s pupils with the glass. Hold the bait steady to keep the dog’s head still. Moving the treat too fast causes blurry motion in the final image. Use high-value rewards that stick to the hand. This ensures the dog stays focused on the target area longer.
- Lens Placement: Hold the treat against the side of your smartphone or camera body. This forces the dog to look into the lens instead of at your forehead. Proper placement ensures the eyes appear sharp and engaging in the final capture.
- Scent Priming: Let the dog smell the treat before you move to your shooting position. This activates their olfactory senses and builds immediate interest. A dog that knows what is at stake will hold a sit-stay position with much better focus and intensity.
- Variable Delivery: Reward the dog at irregular intervals during the photo session. Constant feeding leads to a bored or distracted animal. Giving treats every few frames keeps the dog alert. They will continue to watch the camera in anticipation of the next reward.
- Broken Pieces: Snapping treats into tiny bits prevents the dog from getting full too quickly. A satiated dog loses interest in the session and stops following commands. Small pieces also minimize chewing time. This allows you to get back to shooting without waiting for them to finish.
- The Reset: Toss a treat away from the camera to break a frozen posture. This forces the dog to move and then return to the starting point. It refreshes their body language and prevents the dog from looking stiff or tired in your home studio photos.
Timing is the most critical factor when using food for photography. Give the command and wait for the dog to settle before showing the treat. Release the shutter the exact moment the dog locks eyes with the lens. Deliver the reward immediately after the click to reinforce the behavior. This cycle builds a positive association between the camera and the food reward.
Choosing The Right Toys To Trigger Natural, Playful Expressions Without Chaos
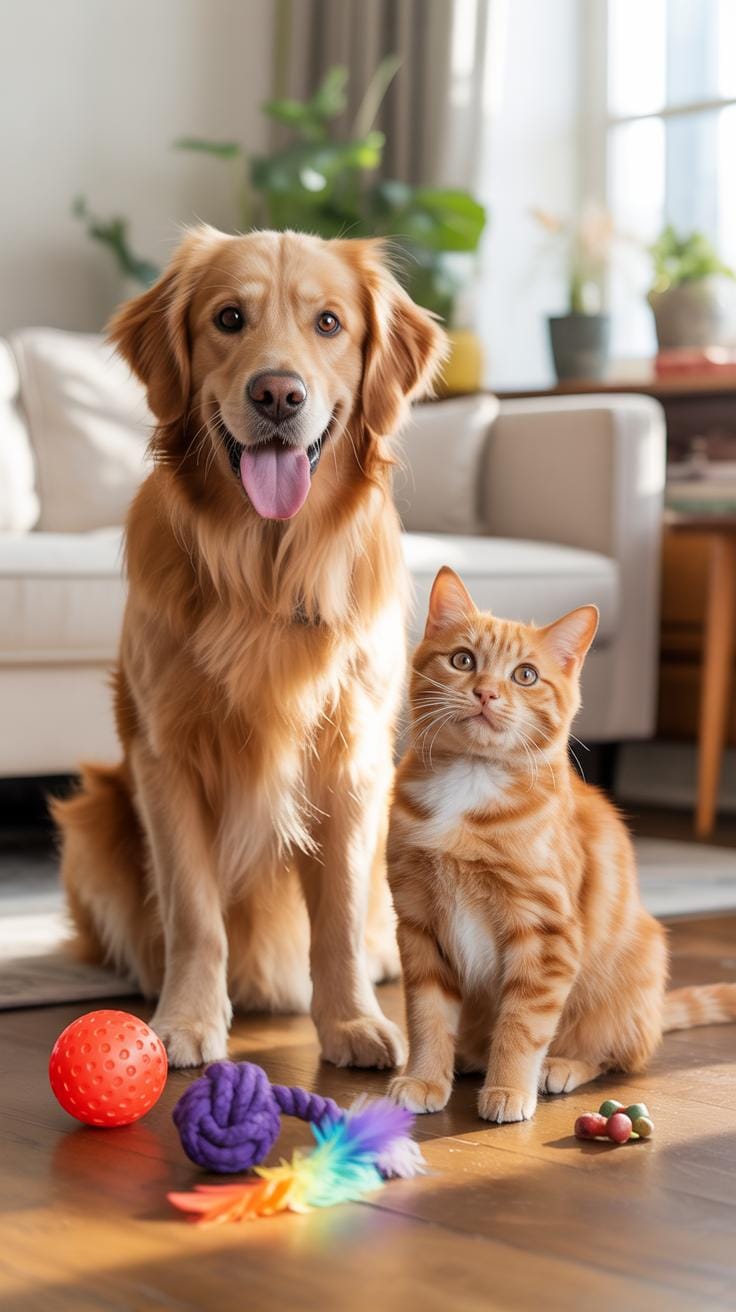
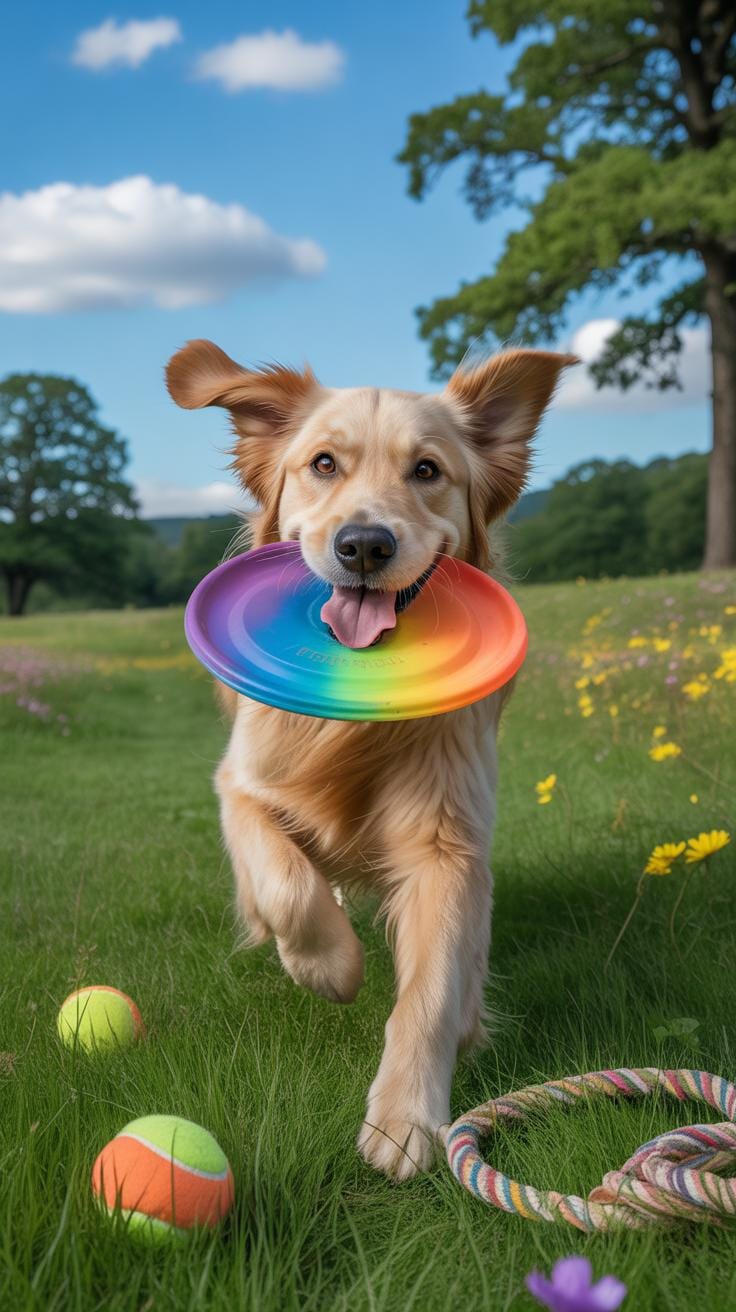
Pick toys that offer visual contrast against your home background. Brightly colored balls or ropes grab a dog’s attention without causing overstimulation. Avoid squeakers if your dog has a high prey drive. Intense noise often leads to lunging or barking rather than a still pose. Use plush items for a calm look and rubber toys for high-energy action shots.

Control the environment by keeping only one toy visible at a time. Multiple objects distract the dog and clutter the composition. Hold the toy at eye level to encourage a proud chest and upright ears. Hide the toy behind your back once you capture the shot. This prevents the dog from jumping at your hands and ruining the focus on your next frame.
Capturing Personality Creative Dog Photo Ideas That Tell A Story
Photographing Your Dog During Everyday Routines For Authentic Candid Shots
Candid photography records real behavior without human interference. You must keep your camera or phone within reach at all times. Stop trying to pose the dog for every frame. Watch for natural actions like drinking water or sleeping in patches of sunlight. These moments show the dog in its natural state. Move slowly to avoid breaking the animal’s focus during these quiet daily activities.
Consistency creates the narrative of the dog’s life. Photograph the same morning walk or mealtime ritual over several days. Use silent shutter mode to prevent the clicking noise from alerting the dog. Low angles work best for candid shots because they match the dog’s physical perspective. Focus on the eyes even during movement. This technique ensures the viewer connects with the dog’s genuine emotions and tasks.
How To Photograph Your Dogs Unique Quirks And Habits For Memorable Images

Every dog has specific physical traits or behavioral oddities. Some dogs tilt their heads at specific sounds while others carry certain toys everywhere. Identify these patterns before you start shooting. Use high shutter speeds to freeze sudden movements like a funny ear twitch or a wet dog shake. Capture these specific details to differentiate your dog from a generic breed photo found in a stock library.
Contextualize these habits by including environmental clues in the frame. If your dog always hides under a specific chair, show the furniture to explain the scale. Close-up shots of paws or snout textures also highlight individuality. Avoid using a flash because it flattens the image and may startle the animal. Use diffused window light to maintain the authentic look of the home environment while emphasizing unique physical features.
Cozy Dog Photography Tips Making The Most Of Indoor Comfort Scenes
How To Style Cozy Nooks, Beds, And Sofas For Warm And Inviting Dog Portraits
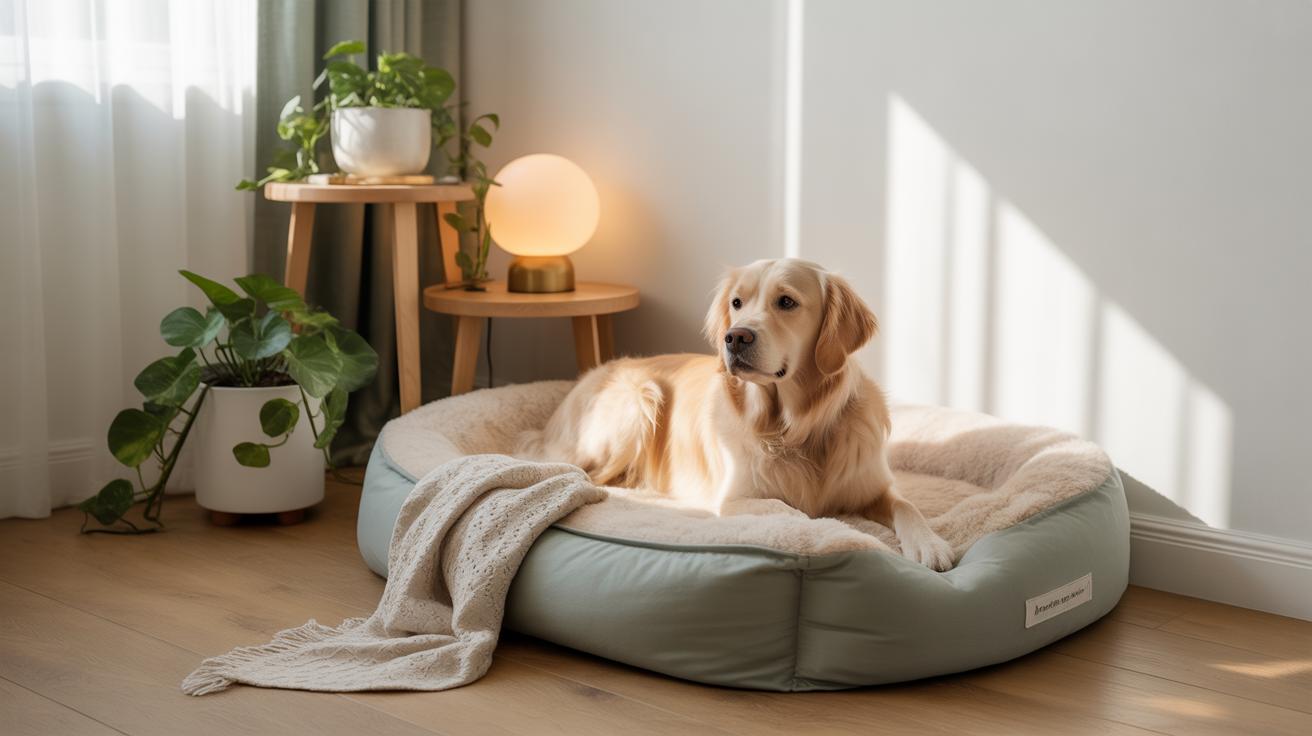
Identify the cleanest light source in your room first. Position the dog bed or sofa within three feet of a large window. Remove all clutter from the background to keep the focus on your dog. Use neutral backdrops like plain walls or minimalist furniture. This creates a professional look without requiring a studio. Natural light reduces digital noise and improves image sharpness significantly.

Place the dog in the center of the frame for a classic portrait look. Use a low camera angle to match the dog eye level. This perspective builds a stronger connection with the viewer. Ensure the furniture legs or bed edges are straight in the frame. Straight lines prevent the photo from looking messy or accidental. Keep the composition simple to highlight the dog facial features.
Using Soft Textures And Warm Tones To Create A Homey, Emotional Atmosphere In Photos
Layer different materials to add visual depth to the scene. Use wool blankets or cotton pillows to create a sense of comfort. These textures absorb light rather than reflecting it. This prevents harsh glares on the camera sensor. Choose materials with matte finishes for the best results. Soft surfaces help the dog feel relaxed and lead to more natural poses during the shoot.
Stick to a warm color palette to boost the emotional impact of the photo. Use browns, tans, and off-whites to mimic midday sun. These tones correlate with feelings of safety and relaxation. Set your white balance to a cloudy or shade setting for extra warmth. Avoid cool blue tones that make white fur look clinical. Proper color temperature makes the indoor setting feel authentic and inviting.
Ideas For Pet Photography At Home Using Seasonal And Holiday Themes
Incorporating Seasonal DéCor Safely And Naturally Into Your Dog’S Photo Setting
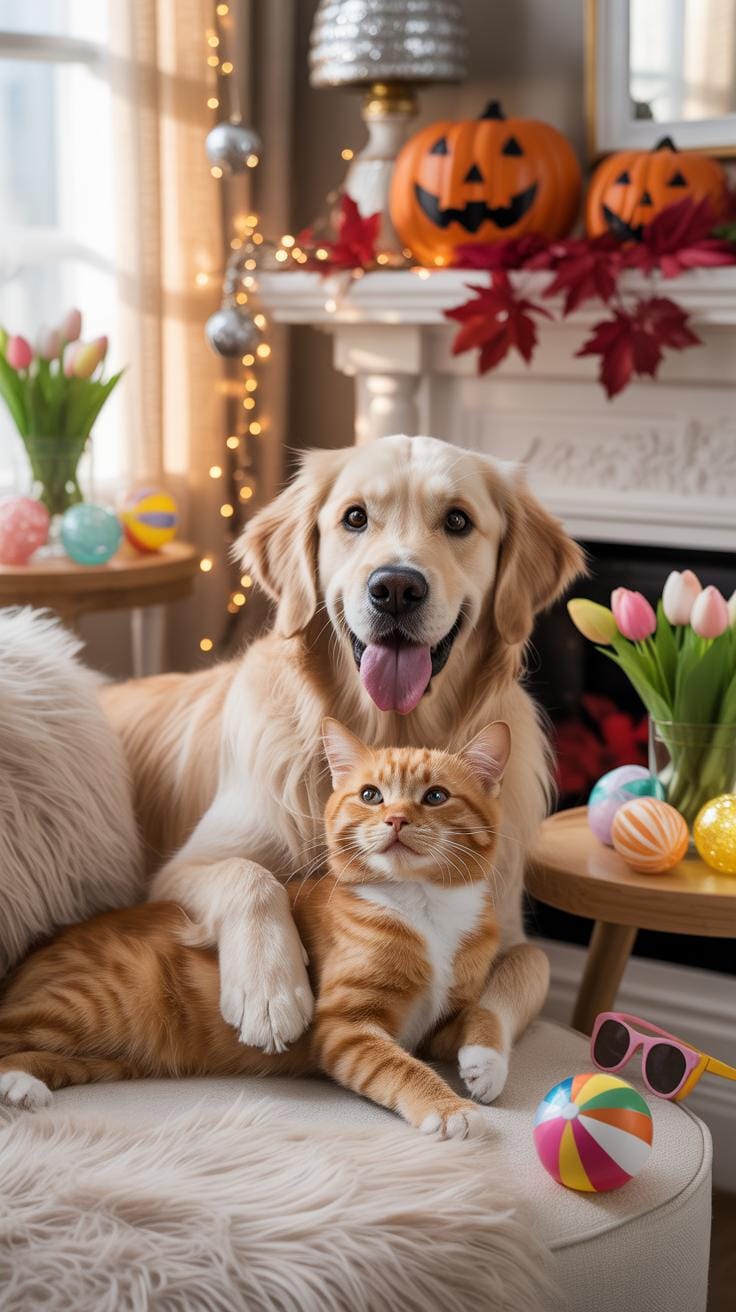
Seasonal props provide visual context and color contrast in home photography. Use existing household items to create a narrative without overwhelming the animal. Position décor in the background or mid-ground to maintain a shallow depth of field. This approach keeps the focus on the dog while establishing a clear seasonal theme. Prioritize stability so items do not fall during the shoot.
- Natural Elements: Use pinecones, pumpkins, or autumn leaves to ground the photo in a specific season. These materials provide organic textures that look professional on camera. Ensure all plant life is non-toxic to dogs before placement.
- Textured Fabrics: Integrate wool blankets or plaid rugs to signify winter or fall warmth. Large textiles cover distracting floor patterns and provide a comfortable surface for the dog to sit. Stick to neutral or deep tones to avoid color cast.
- Soft Lighting: Utilize string lights or candles behind the subject to create bokeh. High placement prevents the dog from touching hot bulbs or electrical wires. This technique adds a holiday glow without using a harsh flash.
- Safe Props: Select durable items like wooden crates or heavy ceramic bowls for visual interest. Avoid small ornaments that pose a choking hazard or glass that can shatter. Sturdy props allow the dog to interact safely with the environment.
- Color Blocking: Coordinate the dog’s collar or a simple bandana with the seasonal palette. Use the color wheel to find complementary hues that make the fur stand out against the décor. Contrast improves the overall composition and professional appearance.

Safety remains the primary concern when modifying your home environment for photography. Remove all electrical cords from the dog’s reach to prevent chewing. Secure heavy trees or large props to the wall or floor. Monitor the dog for signs of stress around new objects. A calm dog produces better shots than one distracted by dangerous or frightening decorations.
How To Plan Simple Themed Shoots At Home Without Stressing Your Dog
Successful themed shoots require preparation and speed to keep the dog engaged. Set up the entire scene before bringing the dog into the room. Check light levels and camera settings using a stuffed animal or an empty chair. This preparation minimizes the time the dog spends waiting under bright lights or in static poses. Short sessions prevent boredom and restlessness.
Use high-value rewards to reinforce positive behavior during the session. Keep treats small so the dog does not spend too much time chewing. Use a familiar toy to direct the dog’s gaze toward the lens. If the dog shows signs of fatigue or anxiety, end the shoot immediately. Respecting the animal’s limits ensures they remain willing participants for future photography projects.
Editing Your Indoor Dog Portrait Tips Into Polished Final Images

Free And Affordable Editing Tools That Work Well For Dog Photography Post Processing
Adobe Lightroom Mobile remains the industry standard for mobile post-processing. The free version offers powerful raw editing capabilities and precise selective adjustments. It handles fur textures and highlights better than most native phone apps. You can create or download presets to maintain a consistent look across all your dog portraits. This tool allows for professional results without a desktop subscription or expensive hardware.
Snapseed is a robust free alternative developed by Google. It features a healing tool that removes distracting background clutter or eye boogers instantly. The Expand tool uses AI to grow your canvas if you cropped the dog too tightly. It provides a non-destructive workflow so you never lose your original file. Use this app for quick fixes and structural tweaks before sharing your photos online.
You don’t need a studio to capture the soul of your best friend; the best light is the one that falls on them in their favorite corner of your home. The most beautiful images are simply honest records of the love shared between a human and a dog.
— Amanda Jones
Basic Editing Adjustments Like Brightness Contrast And Sharpness That Make A Real Difference
Adjusting exposure and contrast fixes the common issue of dull indoor lighting. Most indoor shots suffer from flat shadows that hide your dog’s coat texture. Increase the highlights slightly to make the fur shine and pop against the background. Lower the black point to add depth and grounding to the image. These small changes lead to a more professional look by mimicking high-end studio lighting setups.
Sharpness and clarity tools define the individual hairs and the moisture in the eyes. Focus your sharpening efforts on the eyes to draw the viewer into the portrait. Avoid over-sharpening the entire image as it creates digital noise and looks unnatural. Use the crop tool to remove dead space and keep the dog as the primary subject. Proper framing and clarity ensure the viewer stays focused on your pet.
Building A Consistent Dog Photography Routine You And Your Dog Will Enjoy
How To Keep Photo Sessions Short And Positive To Avoid Overwhelming Your Dog
Dogs possess short attention spans and cannot maintain intense focus for long durations. Limit each photo session to five or ten minutes to prevent mental fatigue. High-value rewards like liver treats or favorite toys keep the dog engaged. Stop the session while the dog still wants more. This ensures the animal associates the camera with positive outcomes rather than frustration or boring repetition.
Watch for physiological signs of stress such as lip licking or yawning. If the dog looks away or hides, end the shoot immediately. Forcing a pose ruins future cooperation and creates a negative bias toward the equipment. Use a high frequency of rewards to reinforce specific positions. Consistent success builds a reliable foundation for complex shots later. Respect the animal’s limits to maintain a willing subject.
Developing A Personal Style In Your Dog Photography That Grows Over Time
Identify common elements in your favorite shots to define your visual style. You may prefer natural window light or high-contrast shadows. Consistency in your choice of angles and backgrounds creates a recognizable portfolio. Study the rule of thirds and leading lines to improve your compositions. Use these classical design principles to ground your work while you experiment with different focal lengths.
Review your older images to track technical progress and artistic shifts. Notice which lens settings or editing techniques reappear in your most successful work. Real style comes from repeated practice and intentional choices rather than random luck. Focus on capturing the unique personality traits of your dog. This personal connection produces authentic images that stock photos cannot replicate. Mastery requires regular shooting in familiar environments.
Frequently Asked Questions

What is the most important thing to remember when photographing your dog at home for the first time?
The secret to success is patience and choosing the right timing. Before you start photographing your dog at home, ensure your pet is relaxed and well-fed. Natural lighting is your best friend, so try setting up near a large window during the daytime. Avoid using a harsh flash, which can cause “red-eye” or startle your pup, and focus on capturing their unique personality in a comfortable, familiar environment.
How can I get my dog to sit still and look at the camera during a DIY photoshoot?
Getting a pup to cooperate requires high-value rewards and clever distractions. Hold a favorite squeaky toy or a small treat directly above your phone or camera lens to draw their gaze toward the shutter. Use short, positive reinforcement sessions and keep your energy calm. When photographing your dog at home, capturing a candid moment while they are engaged with a toy often results in more soulful and authentic images than a forced pose.
Do I need an expensive professional camera to take high-quality pictures of my pet?
Absolutely not! Most modern smartphones are equipped with incredible portrait modes that mimic a professional depth-of-field effect perfectly. You can achieve stunning results by focusing on composition and lighting rather than pricey gear. Simply clear away household clutter to create a clean background and get down on your dog’s eye level. This simple perspective shift instantly elevates your images, making DIY pet photography accessible and beautiful for any budget.